> ## Documentation Index
> Fetch the complete documentation index at: https://docs.mailgreet.com/llms.txt
> Use this file to discover all available pages before exploring further.
# Email Templates Gallery
> Browse, manage, and customize professional email templates in MailGreet for newsletters, marketing, events, and more
# Email Templates
Create beautiful, professional emails with MailGreet's template system. Whether you start from scratch or customize existing designs, our templates make email creation effortless.
***
## Accessing Templates
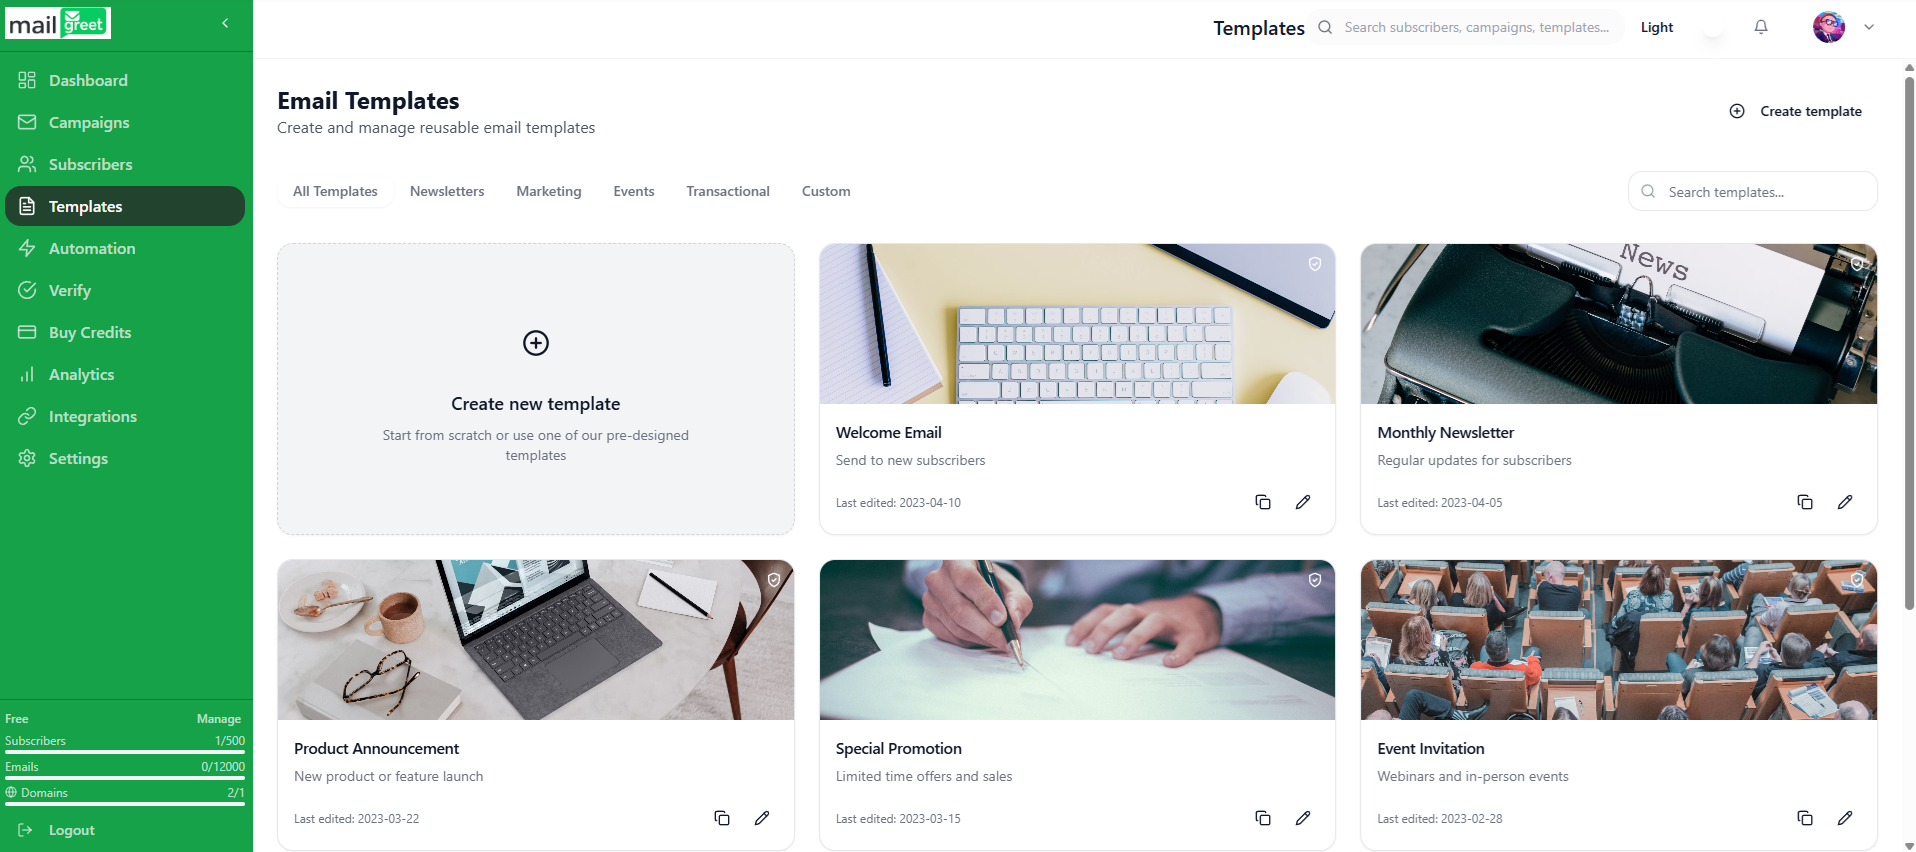
Navigate to **[Templates](https://mailgreet.com/dashboard/templates)** in the sidebar to access your template library.
 ***
## Template Categories
Organize your templates using the built-in category tabs:
View all templates in your account
Regular updates and content digests
Promotional campaigns and offers
Event invitations and reminders
Order confirmations, receipts, etc.
Your custom-created templates
Use the **search bar** to quickly find templates by name.
***
## Template Types
MailGreet supports three template formats:
| Format | Best For | Features |
| ----------------- | ------------- | ------------------------------------------ |
| **Block Builder** | Most users | Drag-and-drop, no coding required |
| **HTML Editor** | Developers | Full HTML/CSS control, syntax highlighting |
| **Plain Text** | Simple emails | Text-only, variable support |
***
## What's in a Template Card?
Each template in your library displays:
* **Template Name** - Click to edit
* **Creation Date** - When it was created
* **Format Badge** - HTML or Block Builder
* **Quick Actions**:
* ✏️ **Edit** - Open in editor
* 📋 **Duplicate** - Create a copy
* 🗑️ **Delete** - Remove template
***
## Creating Your First Template
From the Templates page, click the green **Create template** button in the top right
Select your preferred editor:
**Recommended** — Drag-and-drop builder for professional emails without coding
Full HTML/CSS control with syntax highlighting and live preview
Simple text-based emails with variable support for personalization
Fill in the following:
* **Template Name** — Give it a descriptive name
* **Description** (optional) — Describe the template's purpose
* **Category** — Choose from Newsletters, Marketing, Events, Transactional, or Custom
* **Type** — Select Email Template or Landing Page (paid plans)
Click **Create Template** to open the editor and start designing
***
## Managing Templates
### Edit a Template
1. Find the template in your library
2. Click on the template card or the edit icon
3. Make your changes in the editor
4. Click **Save & Return** to save
### Duplicate a Template
Create a copy to make variations:
1. Hover over the template card
2. Click the **Duplicate** icon
3. A copy is created with "(Copy)" appended to the name
4. Edit the duplicate as needed
### Delete a Template
Deleted templates cannot be recovered. Make sure you really want to remove it!
1. Hover over the template card
2. Click the **Delete** (trash) icon
3. Confirm deletion in the popup
***
## Template Types Explained
**Best for:** Non-technical users, marketers, content creators
**Features:**
* Drag-and-drop interface
* Pre-built content blocks (Text, Image, Button, etc.)
* Real-time desktop/mobile preview
* Global styling options
* Variable insertion for personalization
* Export as HTML
**[Learn more about the Block Editor →](/template-editor)**
**Best for:** Developers, designers with HTML experience
**Features:**
* Full HTML/CSS code editor
* Syntax highlighting
* Live preview panel
* Subject line and preheader fields
* Import external HTML
* Export template JSON
* Variable helper for merge tags
**[Learn to create custom HTML templates →](/creating-custom-templates)**
**Best for:** Simple communications, fallback versions
**Features:**
* Simple text editor
* Variable support (`{{first_name}}`, etc.)
* No formatting required
* Better deliverability for some use cases
***
## Using Variables in Templates
Personalize your templates with merge variables:
| Variable | Output |
| ---------------------- | -------------------------- |
| `{{first_name}}` | Subscriber's first name |
| `{{last_name}}` | Subscriber's last name |
| `{{email}}` | Subscriber's email |
| `{{unsubscribe_link}}` | Unsubscribe URL (required) |
| `{{custom_field}}` | Any custom field value |
Always include `{{unsubscribe_link}}` in your templates to comply with email regulations and maintain deliverability.
***
## Best Practices
Over 60% of emails are opened on mobile. Use the mobile preview to check your design and keep content simple.
Use consistent colors, fonts, and logo placement across all templates for brand recognition.
Include one primary call-to-action per email. Make buttons prominent and text clear.
Always send test emails to yourself before campaigns to check rendering across email clients.
***
## Next Steps
Master the Block-Based Editor
Build HTML templates from scratch
***
## Template Categories
Organize your templates using the built-in category tabs:
View all templates in your account
Regular updates and content digests
Promotional campaigns and offers
Event invitations and reminders
Order confirmations, receipts, etc.
Your custom-created templates
Use the **search bar** to quickly find templates by name.
***
## Template Types
MailGreet supports three template formats:
| Format | Best For | Features |
| ----------------- | ------------- | ------------------------------------------ |
| **Block Builder** | Most users | Drag-and-drop, no coding required |
| **HTML Editor** | Developers | Full HTML/CSS control, syntax highlighting |
| **Plain Text** | Simple emails | Text-only, variable support |
***
## What's in a Template Card?
Each template in your library displays:
* **Template Name** - Click to edit
* **Creation Date** - When it was created
* **Format Badge** - HTML or Block Builder
* **Quick Actions**:
* ✏️ **Edit** - Open in editor
* 📋 **Duplicate** - Create a copy
* 🗑️ **Delete** - Remove template
***
## Creating Your First Template
From the Templates page, click the green **Create template** button in the top right
Select your preferred editor:
**Recommended** — Drag-and-drop builder for professional emails without coding
Full HTML/CSS control with syntax highlighting and live preview
Simple text-based emails with variable support for personalization
Fill in the following:
* **Template Name** — Give it a descriptive name
* **Description** (optional) — Describe the template's purpose
* **Category** — Choose from Newsletters, Marketing, Events, Transactional, or Custom
* **Type** — Select Email Template or Landing Page (paid plans)
Click **Create Template** to open the editor and start designing
***
## Managing Templates
### Edit a Template
1. Find the template in your library
2. Click on the template card or the edit icon
3. Make your changes in the editor
4. Click **Save & Return** to save
### Duplicate a Template
Create a copy to make variations:
1. Hover over the template card
2. Click the **Duplicate** icon
3. A copy is created with "(Copy)" appended to the name
4. Edit the duplicate as needed
### Delete a Template
Deleted templates cannot be recovered. Make sure you really want to remove it!
1. Hover over the template card
2. Click the **Delete** (trash) icon
3. Confirm deletion in the popup
***
## Template Types Explained
**Best for:** Non-technical users, marketers, content creators
**Features:**
* Drag-and-drop interface
* Pre-built content blocks (Text, Image, Button, etc.)
* Real-time desktop/mobile preview
* Global styling options
* Variable insertion for personalization
* Export as HTML
**[Learn more about the Block Editor →](/template-editor)**
**Best for:** Developers, designers with HTML experience
**Features:**
* Full HTML/CSS code editor
* Syntax highlighting
* Live preview panel
* Subject line and preheader fields
* Import external HTML
* Export template JSON
* Variable helper for merge tags
**[Learn to create custom HTML templates →](/creating-custom-templates)**
**Best for:** Simple communications, fallback versions
**Features:**
* Simple text editor
* Variable support (`{{first_name}}`, etc.)
* No formatting required
* Better deliverability for some use cases
***
## Using Variables in Templates
Personalize your templates with merge variables:
| Variable | Output |
| ---------------------- | -------------------------- |
| `{{first_name}}` | Subscriber's first name |
| `{{last_name}}` | Subscriber's last name |
| `{{email}}` | Subscriber's email |
| `{{unsubscribe_link}}` | Unsubscribe URL (required) |
| `{{custom_field}}` | Any custom field value |
Always include `{{unsubscribe_link}}` in your templates to comply with email regulations and maintain deliverability.
***
## Best Practices
Over 60% of emails are opened on mobile. Use the mobile preview to check your design and keep content simple.
Use consistent colors, fonts, and logo placement across all templates for brand recognition.
Include one primary call-to-action per email. Make buttons prominent and text clear.
Always send test emails to yourself before campaigns to check rendering across email clients.
***
## Next Steps
Master the Block-Based Editor
Build HTML templates from scratch