> ## Documentation Index
> Fetch the complete documentation index at: https://docs.mailgreet.com/llms.txt
> Use this file to discover all available pages before exploring further.
# Custom Fields
> Create and manage custom subscriber fields to collect additional information and personalize your email marketing campaigns in MailGreet
## Fields
In MailGreet, a **field** stores the information when a new subscriber is added to the group.
At MailGreet, we offer seven system default fields to get you started:-
**Email**, **First Name**, **Last Name**, **Status**, **Email Status**, **Source**, **Location**.
**Note**: You cannot **edit** or **delete** the **system default fields**.
**Apart from these, a group is also to be selected for the new subscriber.**
Out of these seven system default fields, four fields are automatically set by the system such as:-
**Status**, **Email Status**, **Source**, **Location**
The above fields are not shown in the dialog box when a new subscriber is added.
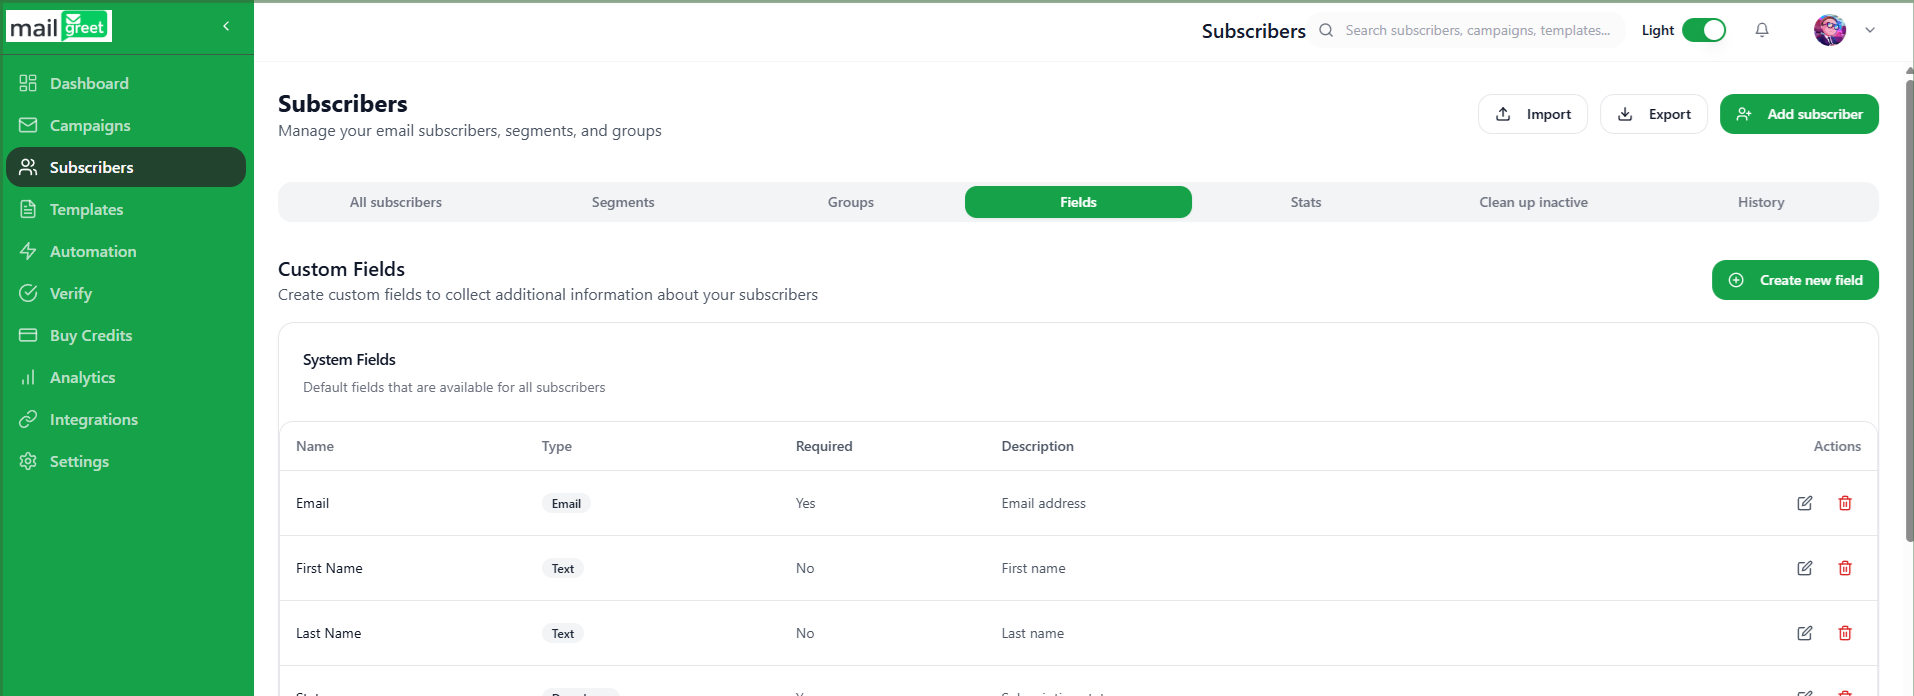
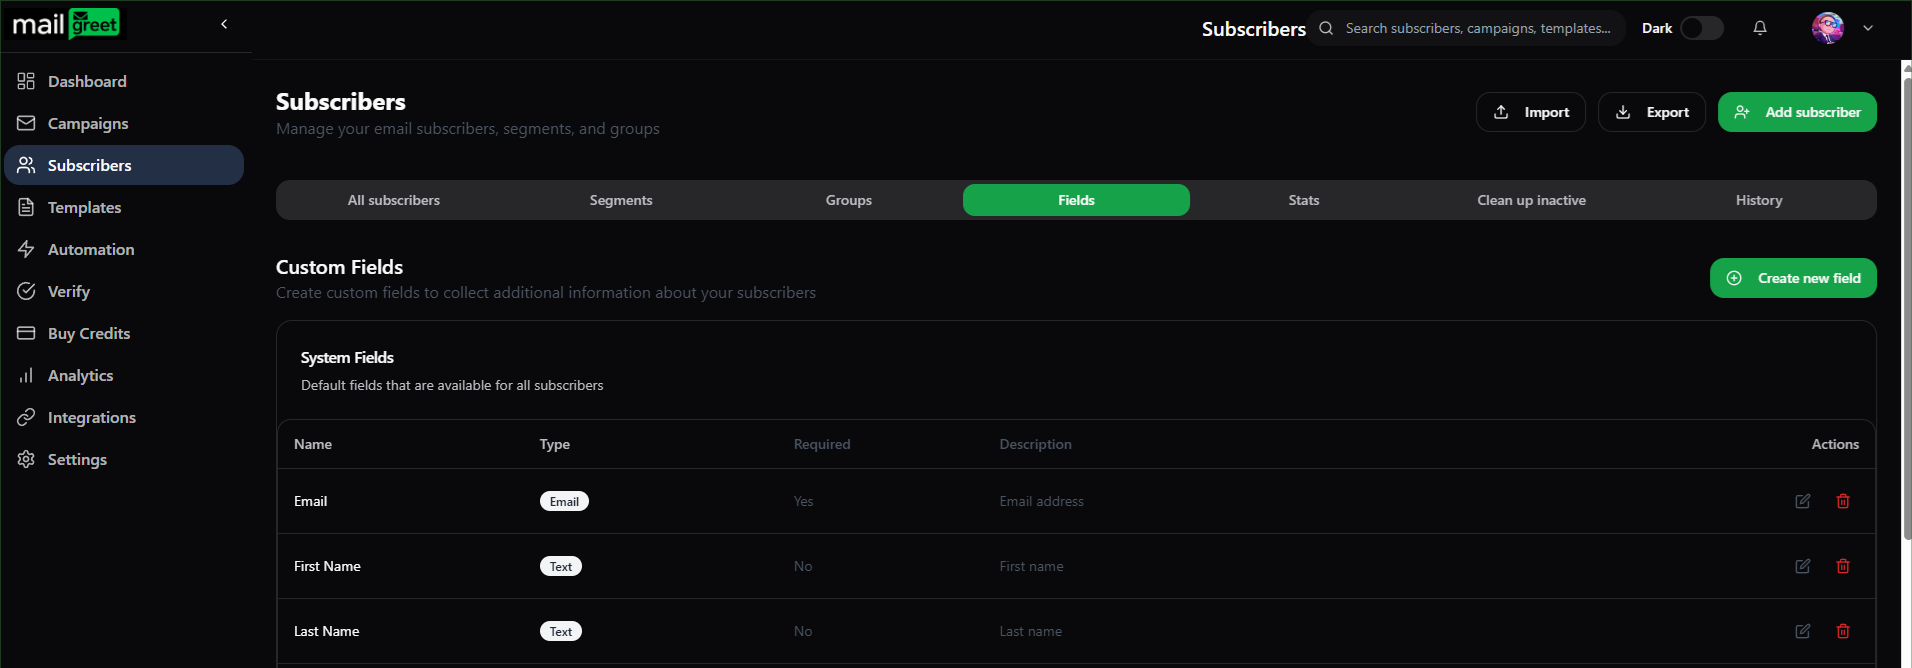
The fields tab is where the system default fields and custom fields are present as shown below:-
 ## Custom Fields
Custom Fields are the fields that you create according to your own needs and rules.
If you want to get additional information from the new subscriber, then you can create your own custom fields.
You can use these custom fields to better manage your new subscribers.
At **MailGreet**, you can create custom fields of the below field type:-
**Text**, **Number**, **Date**, **Yes/No**, **Email**, **Phone**, **URL**, **Dropdown**
## Benefits of Custom Fields
The advantages of Custom Fields are:-
1. Create custom fields for additional subscriber information
2. Use data for personalization in emails
3. Segment subscribers based on custom field values
4. Include custom field data in forms
## Create a Custom Field
To create a custom field:-
1. Navigate to the [Subscribers](https://mailgreet.com/dashboard/subscribers) page.
2. Click on the **Fields** tab.
3. Click on the **Create new field** button on the right side.
4. A new dialog box will appear.
## Custom Fields
Custom Fields are the fields that you create according to your own needs and rules.
If you want to get additional information from the new subscriber, then you can create your own custom fields.
You can use these custom fields to better manage your new subscribers.
At **MailGreet**, you can create custom fields of the below field type:-
**Text**, **Number**, **Date**, **Yes/No**, **Email**, **Phone**, **URL**, **Dropdown**
## Benefits of Custom Fields
The advantages of Custom Fields are:-
1. Create custom fields for additional subscriber information
2. Use data for personalization in emails
3. Segment subscribers based on custom field values
4. Include custom field data in forms
## Create a Custom Field
To create a custom field:-
1. Navigate to the [Subscribers](https://mailgreet.com/dashboard/subscribers) page.
2. Click on the **Fields** tab.
3. Click on the **Create new field** button on the right side.
4. A new dialog box will appear.
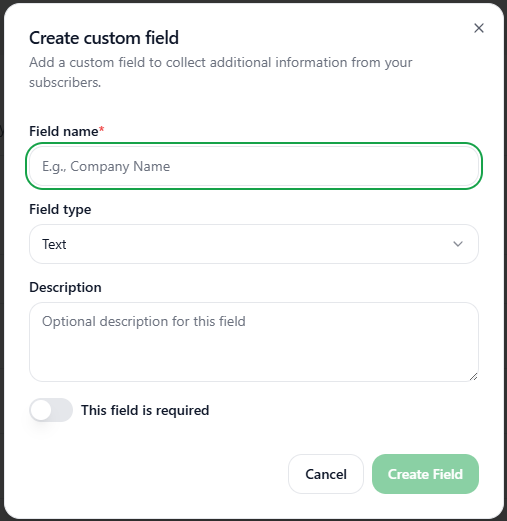
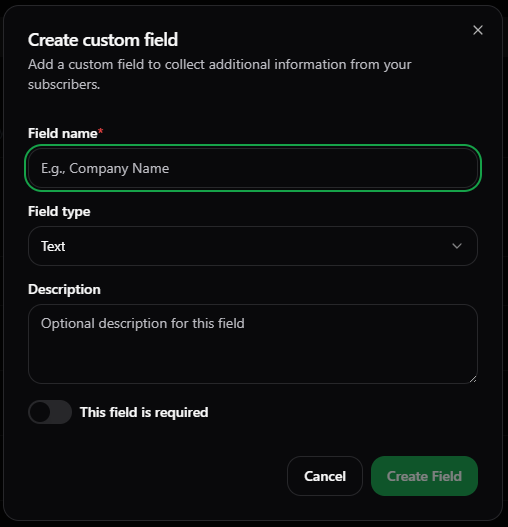 5. Enter the appropriate **Field name**.
6. Select the appropriate **Field type** from the dropdown menu.
7. Enter the **Description** of the custom field.
8. Toggle the button to choose if **This field is required** or **not**. The button is off by default.
9. Click on the **Create Field** button.
10. Now, you have successfully created a new custom field.
5. Enter the appropriate **Field name**.
6. Select the appropriate **Field type** from the dropdown menu.
7. Enter the **Description** of the custom field.
8. Toggle the button to choose if **This field is required** or **not**. The button is off by default.
9. Click on the **Create Field** button.
10. Now, you have successfully created a new custom field.

 ## Delete a Custom Field
To delete a custom field:-
1. Navigate to the [Subscribers](https://mailgreet.com/dashboard/subscribers) page.
2. Click on the **Fields** tab.
3. Scroll down to the bottom of the page.
4. You will see Custom Fields section in which custom fields created by you will be shown.
5. Click on the **Delete Field** button which is a red dustbin icon below the Actions field of the custom field which you want to delete.
## Delete a Custom Field
To delete a custom field:-
1. Navigate to the [Subscribers](https://mailgreet.com/dashboard/subscribers) page.
2. Click on the **Fields** tab.
3. Scroll down to the bottom of the page.
4. You will see Custom Fields section in which custom fields created by you will be shown.
5. Click on the **Delete Field** button which is a red dustbin icon below the Actions field of the custom field which you want to delete.

 6. A new dialog box will appear.
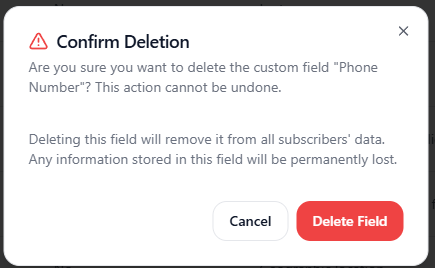
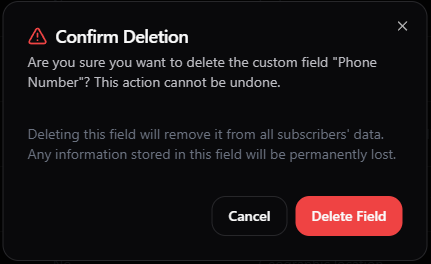 7. Click on the **Delete Field** button to delete the custom field.
8. The custom field is successfully deleted.
## Edit a Custom Field
To edit a custom field:-
1. Navigate to the [Subscribers](https://mailgreet.com/dashboard/subscribers) page.
2. Click on the **Fields** tab.
3. Scroll down to the bottom of the page.
4. You will see Custom Fields section in which custom fields created by you will be shown.
5. Click on the **Edit Field** button to the far right side of the webpage under the Actions field of the custom field which you want to edit.
6. A new dialog box will appear.
7. Click on the **Delete Field** button to delete the custom field.
8. The custom field is successfully deleted.
## Edit a Custom Field
To edit a custom field:-
1. Navigate to the [Subscribers](https://mailgreet.com/dashboard/subscribers) page.
2. Click on the **Fields** tab.
3. Scroll down to the bottom of the page.
4. You will see Custom Fields section in which custom fields created by you will be shown.
5. Click on the **Edit Field** button to the far right side of the webpage under the Actions field of the custom field which you want to edit.
6. A new dialog box will appear.
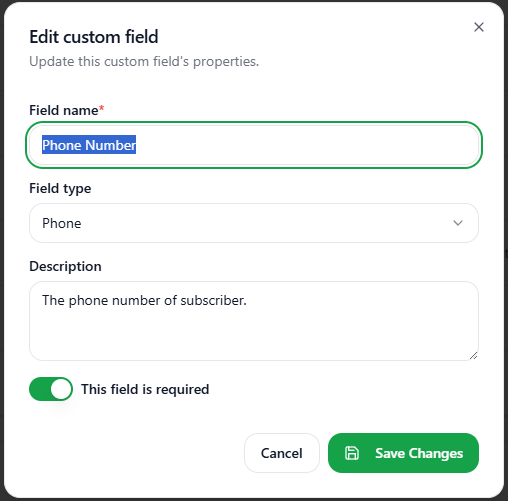
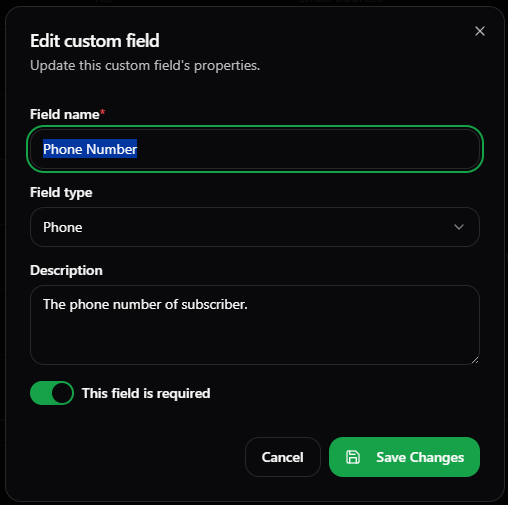 7. You can edit the **Field name**, **Field type** and the **Description** of the custom field.
8. You can also choose whether the field is required or not by toggling the button on or off.
9. Make the changes and click on the **Save Changes** button.
10. You have successfully made changes to the custom field.
7. You can edit the **Field name**, **Field type** and the **Description** of the custom field.
8. You can also choose whether the field is required or not by toggling the button on or off.
9. Make the changes and click on the **Save Changes** button.
10. You have successfully made changes to the custom field.